
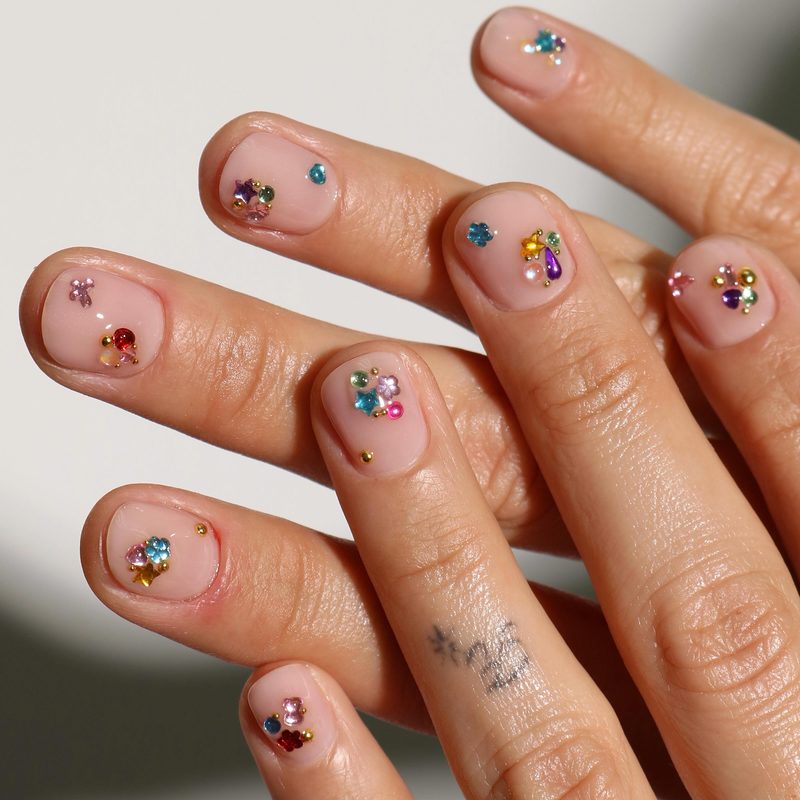
Ever stared at your freshly painted nails and wished they had a little extra sparkle? That’s where rhinestones for nail art come in, offering an instant upgrade to any manicure. Whether you’re prepping for a special event or simply want to glam up your everyday look, these tiny gems create a stunning, eye-catching effect that’s both elegant and fun. But applying rhinestones isn’t just about sticking on some stones—it’s an art form that combines creativity with precision.
In this article, we’ll dive into everything you need to know about rhinestones for nail art—from picking the right types and sizes to mastering application techniques and styling tips. Plus, we’ll explore how to care for your embellished nails so they last longer and look flawless. Ready to add a little sparkle to your nail routine? Let’s get started.
In this article:
Choosing the Right Rhinestones for Nail Art
Not all rhinestones are created equal when it comes to nail art. Selecting the right type depends on the look you want to achieve and how long you want your design to last. Glass and crystal rhinestones offer brilliant shine and durability, making them popular among nail professionals. Acrylic rhinestones are lighter and more affordable, perfect for casual or temporary styles.
Additionally, size matters. Tiny micro rhinestones add subtle sparkle, while larger stones create bold accents. You can mix sizes to build dynamic, textured designs. Color options are nearly endless—from classic clear to vivid hues—which allows you to match any nail polish or theme.
Before purchasing, consider your skill level and nail condition. If you’re new to rhinestone nail art, starting with fewer stones on a simple base color can help you get comfortable with application techniques without feeling overwhelmed.
Step-by-Step Guide to Applying Rhinestones for Nail Art
Applying rhinestones to nails is a delicate process, but with the right tools and steps, anyone can master it. Start with a clean, dry nail surface after your base color is fully cured. Use a small dotting tool or tweezers to pick up each rhinestone carefully.
Next, apply a small amount of nail glue or a gel topcoat where you want the rhinestone placed. Press the stone gently onto the nail and hold it in place for a few seconds. Repeat this process for each rhinestone, arranging them in your desired pattern.
Finally, seal your design with a thick layer of gel topcoat, focusing around the rhinestones to lock them in securely. This step not only enhances shine but also extends the wear of your nail art. For inspiration on combining rhinestones with other styles, check out our nail art with accessories guide.
Top Trends Using Rhinestones for Nail Art
Rhinestones for nail art continually evolve with fashion, pairing well with styles ranging from minimalist to extravagant. Recently, 3D nail art has gained popularity, where rhinestones combine with charms and textured gels like simple 3D nail art designs to create eye-catching statements.
Another trend is mixing rhinestones with chrome powders or metallic finishes. The reflective surfaces complement the sparkle of rhinestones, offering a futuristic vibe. This pairing works perfectly for party looks and special occasions.
For subtle elegance, French tip manicures adorned with a single line of rhinestones are making a comeback. These classic styles get a fresh update, proving rhinestones can fit into any aesthetic, no matter how bold or understated.
Maintaining Your Rhinestone Nail Art for Longevity
Keeping your rhinestone nail art looking flawless requires some care. Avoid excessive water exposure, which can weaken the adhesive holding the stones in place. Wearing gloves while doing household chores is a simple way to protect your manicure.
When moisturizing, steer clear of applying cuticle oil directly around the stones, as it may loosen them over time. Instead, focus on hydrating the skin around your nails to maintain a neat appearance.
Should a rhinestone fall off, don’t panic. Many nail salons offer quick touch-up services to reattach stones, or you can fix it yourself using clear nail glue. For durability tips, explore our acrylic powder nail art article that highlights long-lasting nail techniques.
Professional vs. DIY Rhinestone Nail Art: What You Need to Know
While rhinestones for nail art can be applied at home, visiting a professional nail salon often ensures a more polished and durable finish. Professionals have access to high-quality materials and tools, as well as advanced techniques like gel sculpting, which can better secure embellishments.
However, DIY nail art is increasingly popular thanks to online tutorials and affordable kits. If you choose to do it yourself, invest in a professional nail art kit that includes rhinestones, precision tools, and strong adhesives. Practicing on fake nails first helps build your confidence.
Whether you opt for a salon visit or at-home application, understanding the basics of rhinestone placement and care will enhance your results. For more inspiration, see our guide on professional nail art kits that make DIY designs easier and more effective.
Frequently Asked Questions
How long do rhinestones for nail art typically last?
Rhinestones can last anywhere from several days to over two weeks, depending on the adhesive used and how well you maintain your nails. Professional gel applications offer the longest wear, while DIY methods may require touch-ups sooner.
Can I remove rhinestones from my nails at home safely?
Yes, you can safely remove rhinestones by soaking your nails in warm, soapy water to soften the adhesive, then gently lifting the stones with a wooden cuticle stick. Avoid forceful removal to prevent damage to your natural nails.
Are rhinestones safe to use on natural nails?
Rhinestones are safe for natural nails as long as proper adhesives are used and removal is done carefully. Avoid overusing heavy embellishments on weak nails to prevent stress or breakage.
What tools do I need to apply rhinestones for nail art at home?
Essential tools include nail glue or gel topcoat, tweezers or dotting tools for precise placement, and a UV lamp if using gel polish. Having a clean, well-prepped nail surface is crucial for best results.
Can rhinestones be combined with other nail art techniques?
Absolutely. Rhinestones pair beautifully with techniques like chrome powder, acrylic powder, and 3D nail art, adding dimension and sparkle. For ideas, check out our simple 3D nail art designs guide.
Rhinestones for nail art are a captivating way to add sparkle, dimension, and individuality to your manicure. Whether you prefer subtle accents or lavish designs, understanding how to choose, apply, and maintain these dazzling embellishments will elevate your nail art game. Don’t hesitate to experiment with different styles or consult professionals to find your perfect look. Ready to shine? Start incorporating rhinestones into your next manicure and watch your nails steal the spotlight.